
1.1. 구축 환경 / 테스트 목적
- gitlab container 실행중
- gitlab-runner 를 container 로 실행 후 연결 테스트
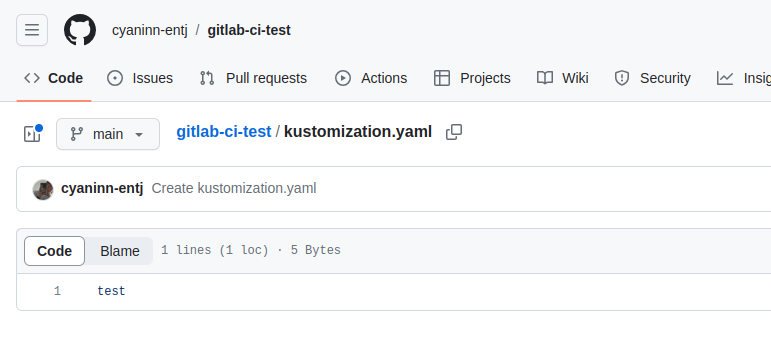
gitlab-ci.yaml 를 통해 AWS private ECR repository 로 image push 테스트- gitlab-ci.yaml 를 통해 github public repository 로 kustomization.yaml push 테스트
1.2. 1. gitlab-runner container 생성 및 gitlab project 등록
1.2.1. 1.1 gitlab-runner container 생성
<bash />docker run -d --name gitlab-runner --network gitlab_default gitlab/gitlab-runner:latest
gitlab container 와 같은 docker network 사용
본인은 default 로 생성시 gitlab container 와 연결되지 않았음
1.2.2. 1.2 project runner 등록
gitlab project 의 setting -> cicd -> runner 에서 아래 확인

show runner installation 버튼을 클릭하면
위 화면에서 gitlab 도메인과 token 확인 가능
gitlab-runner 컨테이너로 접속 후 해당 토큰 사용
      <bash />


      # gitlab-runner container 접속
docker exec -it gitlab-runner /bin/bash

gitlab-runner register
Runtime platform                                    arch=amd64 os=linux pid=42 revision=b72e108d version=16.1.0
Running in system-mode.

Enter the GitLab instance URL (for example, https://gitlab.com/):
http://gitlab.example.com/
Enter the registration token:
my-token
Enter a description for the runner:
[ea8e8a3d965a]:
Enter tags for the runner (comma-separated):
test-ci
Enter optional maintenance note for the runner:

WARNING: Support for registration tokens and runner parameters in the 'register' command has been deprecated in GitLab Runner 15.6 and will be replaced with support for authentication tokens. For more information, see https://gitlab.com/gitlab-org/gitlab/-/issues/380872
Registering runner... succeeded                     runner=GR1348941JjyX3TNR
Enter an executor: docker-autoscaler, docker+machine, custom, docker, docker-windows, shell, ssh, virtualbox, kubernetes, parallels, instance:
shell
Runner registered successfully. Feel free to start it, but if it's running already the config should be automatically reloaded!

Configuration (with the authentication token) was saved in "/etc/gitlab-runner/config.toml"
이후 gitlab-runner 서비스 시작
<bash />gitlab-runner start
1.3. 2. credentials 변수 등록
personal access key 를 이용하는 방법으로 시도했다 실패했다.
ssh key 를 생성해 등록하는 방법을 사용함
sample github repository 생성
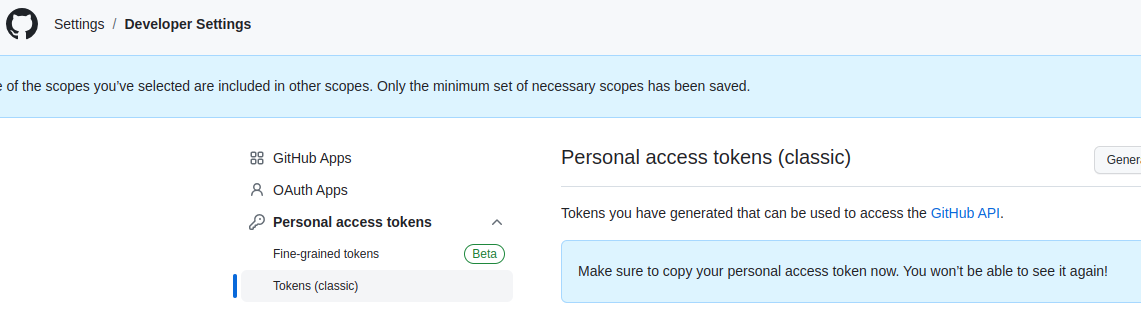
github personal access token 생성
GitLab Project 설정:
- GitLab에 로그인한 후, 해당 프로젝트로 이동합니다.
- 프로젝트의 "Settings"로 이동합니다.
- 좌측 메뉴에서 "CI/CD"를 선택합니다.
- "Variables" 섹션으로 이동하여 "Add variable" 버튼을 클릭합니다.
- 변수 이름에 GITHUB_ACCESS_TOKEN을 입력하고, 값에는 이전에 복사한 GitHub Access Token을 붙여넣습니다.
- "Protect variable" 옵션을 선택하여 변수를 보호하고, "Save variables" 버튼을 클릭하여 저장합니다.
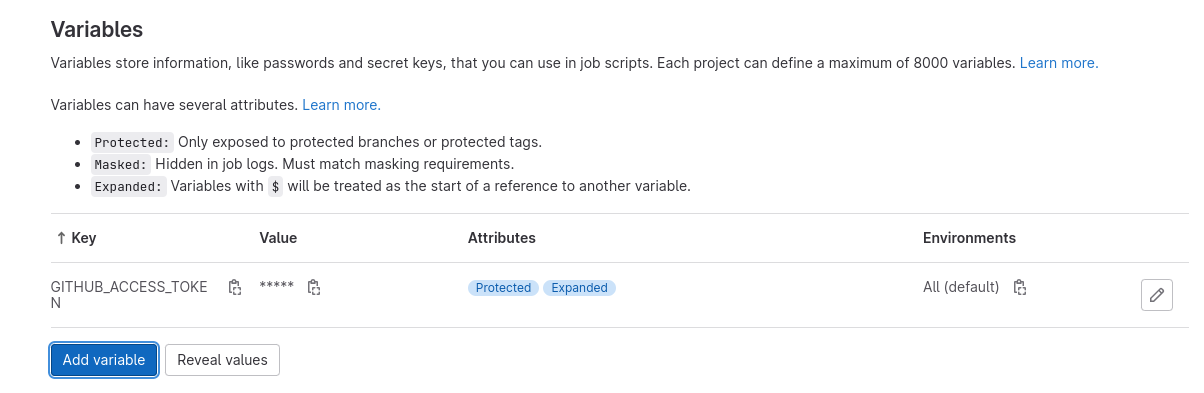
GITHUB_ACCESS_TOKEN 이름으로 변수 생성
1.4. 2. ssh key 생성 및 등록
1.4.1. 2.1. create ssh key pair
      <bash />


      ssh-keygen -t rsa -b 4096 -C "my-github@email.com" -f /home/gitlab-runner/.ssh/id_rsa
gitlab-runner 컨테이너에서 생성
1.4.2. 2.2. change ownership and permissions
<bash />chown gitlab-runner:gitlab-runner /home/gitlab-runner/.ssh/id_rsa chmod 600 /home/gitlab-runner/.ssh/id_rsa
소유자 및 권한 변경
pipeline 실행 시 gitlab-runner 유저로 실행되기 때문에 소유자가 root 인 key 파일의 소유자를 변경해줌
1.4.3. 2.3. add id_rsa.pub to github
github login - setting - ssh and gpg keys - add key
1.4.4. 2.4. verify the host key 'gitlab-runner' user
<bash />ssh -T git@github.com
git clone 이 되지 않는 오류 해결위해 실행함
ssh -T github.com 명령어는 GitHub에 대한 SSH 연결을 테스트하는 명령어입니다.
여기서 ssh는 Secure Shell의 약자로, 원격 서버와 안전하게 통신하기 위해 사용되는 프로토콜입니다. -T 옵션은 "pseudo-terminal allocation"을 비활성화하는 것을 의미하며, 실제 터미널 세션을 할당하지 않고 연결을 테스트하는 데 사용됩니다.
github.com은 GitHub의 호스트 이름으로, 이 명령어는 GitHub 서버에 SSH 연결을 시도하고 인증을 수행합니다. 연결이 성공하면 "Hi {username}! You've successfully authenticated, but GitHub does not provide shell access."와 같은 환영 메시지가 출력될 수 있습니다. 이 메시지에서 {username} 부분은 사용자의 GitHub 계정 이름으로 바뀝니다.
1.4.5. 2.5. Append the GitHub host key to the known_hosts file using ssh-keyscan manualy
      <bash />


      $ ssh-keyscan github.com >> /home/gitlab-runner/.ssh/known_hosts
# github.com:22 SSH-2.0-babeld-d815c248
# github.com:22 SSH-2.0-babeld-d815c248
# github.com:22 SSH-2.0-babeld-d815c248
# github.com:22 SSH-2.0-babeld-d815c248
# github.com:22 SSH-2.0-babeld-d815c248
처음 연결시 clone 을 해오지 못하는 문제 해결을 위해 known_hosts 에 github.com 도메인을 등록
/root 아래의 /.ssh 가 있고 직접 만든 /.ssh 가 있는데 ssh-add 가 실행되는 디렉토리 (gitlab-runner 유저가 접근 가능한 디렉토리) 에 있는 known_hosts 파일에 추가해줘야 한다.
1.5. 3. gitlab-ci.yaml 작성
gitlab repository 에서 project clone
.gitlab-ci.yml
      <bash />


      stages:
  - push_to_github


push_to_github:
  stage: push_to_github
  script:
    - git config --global user.name "cyaninn-entj"
    - git config --global user.email "sounddevice3@gmail.com"
    - eval "$(ssh-agent -s)"
    - ssh-add /home/gitlab-runner/.ssh/id_rsa  # Add the private key to the agent
    - git clone git@github.com:cyaninn-entj/gitlab-ci-test.git
    - cp -r manifest/* gitlab-ci-test/
    - cd gitlab-ci-test
    - git add .
    - git commit -m "Update kustomization.yaml from GitLab CI/CD pipeline"
    - git push origin main  # Change 'master' to your desired branch if needed
  tags:
    - test-ci
~
.gitlab-ci.yaml 이름으로 생성했었는데 pipeline 작동하지 않았음. yml 확장자로 해야하나봄
manifest 라는 디렉토리도 하나 만들어주고 적당한 값을 넣어줌
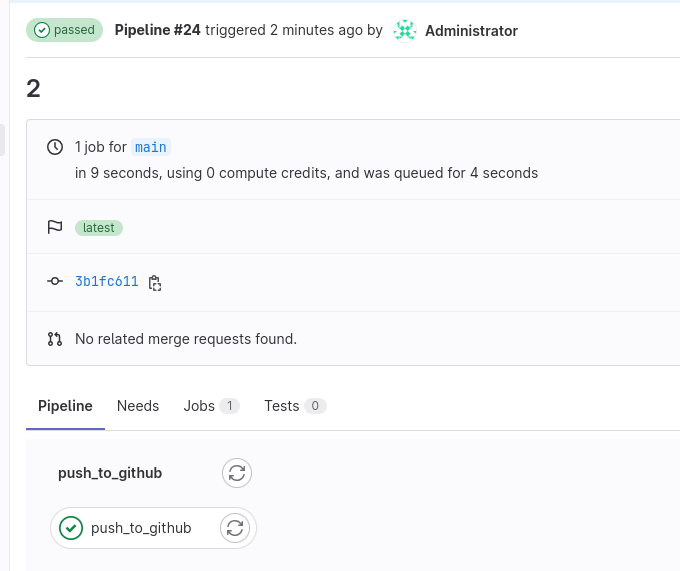
1.6. 4. build / push 테스트 확인
      <bash />


      git add .
git commit -m "commit text"
git push

1.7. 참고
https://not-to-be-reset.tistory.com/326
[GitLab CI] docker gitlab-runner 등록 및 간단 예제
간단하게 gitlab runner를 docker로 실행해서 CI 과정을 수행해봄 0. 사전준비 - docker 설치(gitlab-runner를 docker로 실행하기 위해서 설치 필요. 운영체제 별로 local로 설치하는 법이 존재하지만 여기서는 do
not-to-be-reset.tistory.com
'IT etc > Gitlab' 카테고리의 다른 글
| GitLab 개요 / 로컬 GitLab 서버 구축 / 간단 사용법 (0) | 2023.07.13 |
|---|